Facebook is not only a platform for connecting people but also a powerful tool for promoting products, services, or simply sharing interesting moments. Among its features, the location check-in function has become an important part, helping users or businesses create a mark and enhance engagement. Below is a quick and effective way to create a check-in location on Facebook.
1. What is creating a check-in location on Facebook?
The feature of creating a check-in location allows users to record a specific location and share it on Facebook. Especially for business Fanpages, adding a check-in location helps customers easily mark that they have visited, used services, or experienced the place.
This not only enables customers to showcase their experience but also serves as a way for restaurants or businesses to reach potential customers. Because the message is spread to the friends of the person checking in, it creates a natural viral effect.
2. Benefits of creating a check-in location for Fanpages
Increase effective connection and interaction
The check-in feature on Facebook acts as a bridge between customers and your Fanpage. When customers check in at your location, this information appears on their timeline and is visible to their friends. This is a great way to expand reach without advertising costs. Check-ins often come with comments, reviews, or shares, helping your Fanpage gain community attention and significantly increase engagement.
Build brand and natural promotion
Each check-in is an opportunity to promote your brand to a wide range of social media users. When customers check in, they implicitly affirm the quality of your products or services at your location. This not only helps your brand spread more widely but also becomes a powerful PR tool, attracting attention and building trust among other users.

Drive business growth
The more check-ins, the higher the popularity of the location. New customers, seeing their friends check in at your place, are more likely to want to experience it themselves. This is an effective way to attract new customers without additional marketing budget. At the same time, positive reviews and shares from customers also enhance your business credibility, promoting sustainable development.
Gain deeper insights into potential customers
Through check-ins, you can collect valuable data about customers, such as age, gender, interests, and habits. This information helps you build marketing and advertising strategies better tailored to your target audience. Understanding customers not only optimizes campaign effectiveness but also increases the ability to create better experiences for them.

==> See also: Quality Facebook Ad Account Rental Services
3. How to create a check-in location on Facebook
How to create a check-in location on Facebook using a mobile phone
Creating a check-in location on Facebook not only helps you record memorable moments but also easily share interesting experiences with friends. Below is a detailed step-by-step guide:
Detailed instructions:
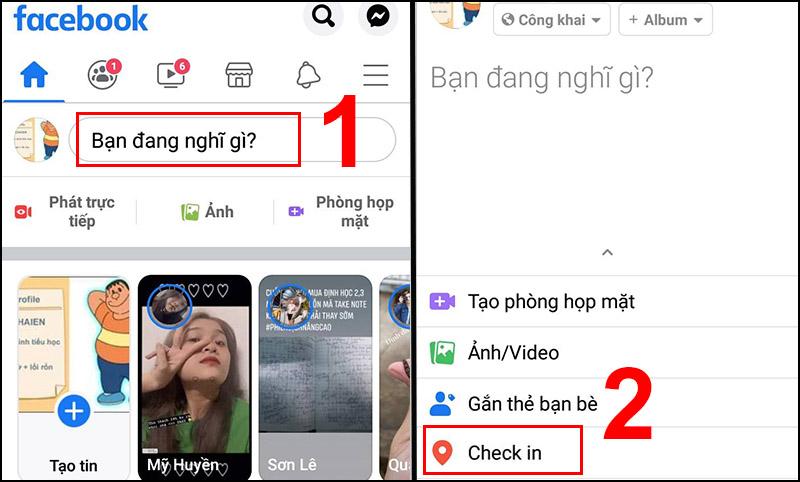
Step 1: Open the Facebook app on your phone. Tap on the “What’s on your mind?” box at the top of the page to start creating a new post.
Step 2: In the options below the post box, find and tap on the “Check in” option (location pin icon).
Step 3: Type the name of the location you want to check in to the search bar. If the location already exists, select the correct name from the list that appears.
Step 4: To make your post more engaging, you can write a few lines of status, add images, or tag friends who join you.
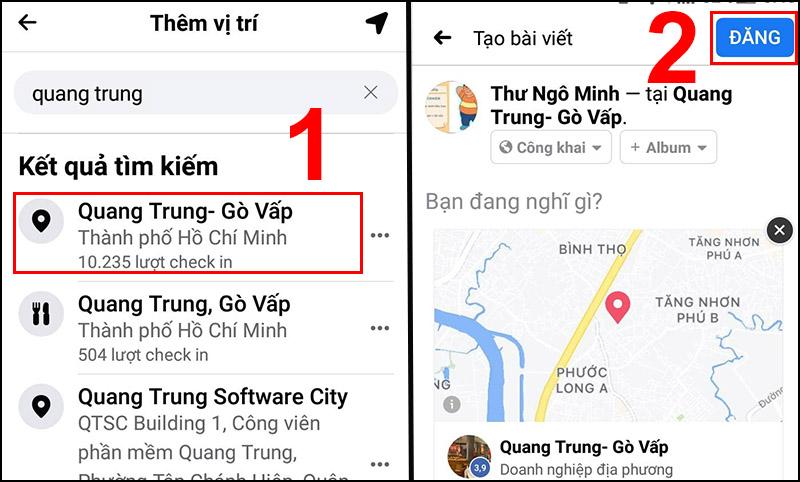
Step 5: After completing the post, tap “Post” to share your check-in location and experience on your timeline.
If the location you want to check in does not exist, you can create a new location by tapping the “Add location” option and filling in specific information such as the location name, address, and category.
How to create a check-in location on Facebook using a computer
Creating a check-in location on Facebook via computer is very easy; just follow these steps:
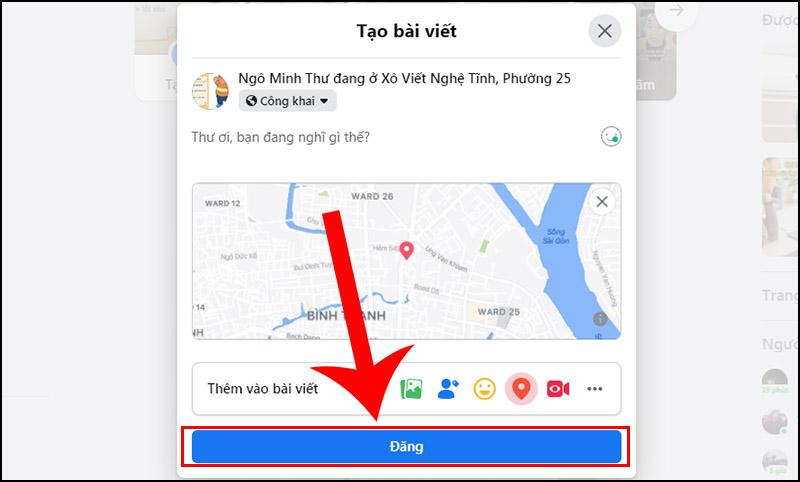
- Step 1: Open a browser on your computer and go to Facebook. After logging in, find the “What’s on your mind?” box at the top of the newsfeed. This is where you start creating a post.
- Step 2: In the options below the post box, click on the Check-In icon (usually a location pin icon).
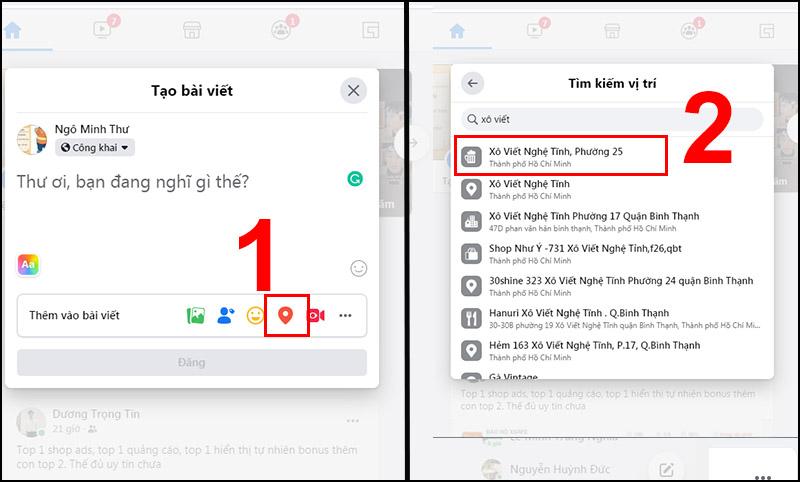
- Step 3: Enter the name of the location you want to share in the search box. Facebook will display related suggestions; simply select the correct location you want to check in to.
- Step 4: Write additional thoughts, status, or any content you want to share along with the location. Then click “Post” to complete.
4. How to delete a created check-in location on Facebook
If you need to change your business address or no longer want the location to be public on your Fanpage, deleting the check-in location on Facebook is a necessary solution. Below is a detailed guide to help you do it easily:
Step 1: Log in to your personal Facebook account that has admin rights to the Fanpage. Use the search bar to find and access the Fanpage you want to edit.
Step 2: On the main interface of the Fanpage, find and click on the “About” section (usually located in the left menu bar).
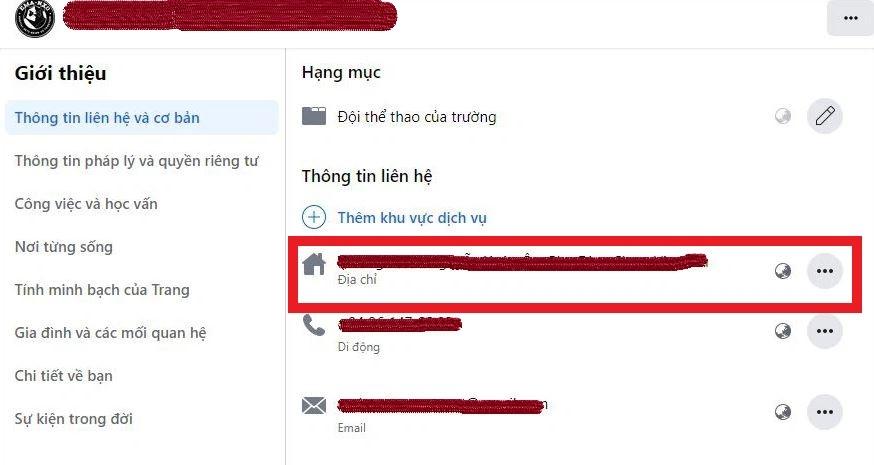
Step 3: In the “Contact and Basic Info” section, you will see the address with a house icon. Click on the three-dot icon (…) next to the address information to open the options menu.
Step 4: In the displayed menu, there are two options: “Edit Address” and “Delete.” Click “Delete” to start the deletion process.
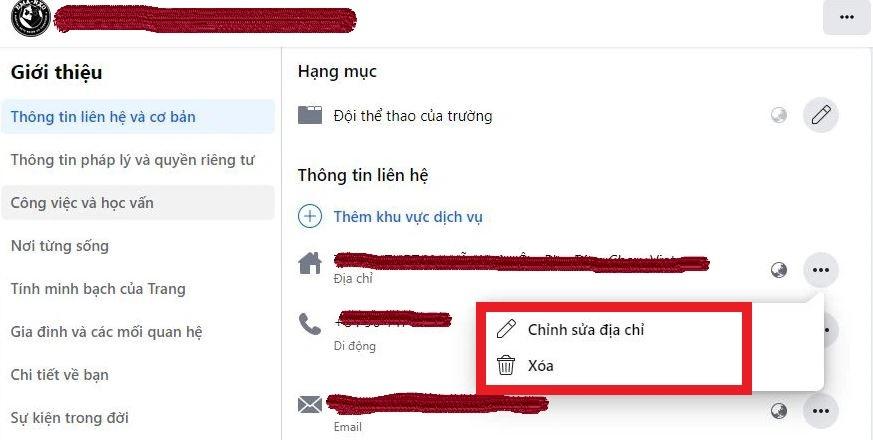
Step 5: Facebook will show a confirmation prompt before deleting the address. Review carefully and click “Confirm” to complete the process.
Notes when deleting a check-in location:
- Immediate effect: After deletion, the check-in location will no longer appear on the Fanpage.
- Impact on engagement: If customers have previously checked in at this address, related posts or photos will remain but will no longer be linked to the location.
- Consider carefully before proceeding: Make sure that deleting the location is necessary to avoid data loss or negative effects on business operations.
5. Some important notes when creating check-ins for Fanpages
Creating a check-in location for your Fanpage not only helps your business better reach customers but also serves as an effective way to build your brand image. To maximize this feature, keep in mind the following key points:
Provide accurate and complete address: An accurate address is the most important factor when creating a check-in location. Specific and complete information helps customers easily find your location and avoids confusion when they want to check in or visit.
Update address information when necessary: If your business changes location or adjusts contact information, update it immediately on your Fanpage. This not only improves customer experience but also maintains the professionalism of your Fanpage.
Encourage customers to check in: Motivate customers to check in by implementing promotions, discounts, or small gifts when they check in and share their experience. This is an effective way to increase engagement and gain free promotion.
Engage with customers after they check in: When customers check in at your Fanpage, take time to respond to comments, thank them, or interact. This care helps build trust and creates a sense of being valued for customers.
Control privacy settings if needed: If you want to keep location information visible only to a specific group, adjust privacy settings accordingly. This helps protect information and manage access efficiently.
We hope that the information in the article on how to create a check-in location on Facebook, shared by LoLo Media, will help you perform the steps easily. Don’t hesitate to explore and make the most of Facebook’s features to have wonderful experiences.