Have you ever tried to delete a photo on Facebook but failed? Maybe you have tried multiple times but did not get the desired result. Below are some reasons why you might not be able to delete photos on Facebook and effective ways to fix these issues.
1. Reasons why you can’t delete photos on Facebook
Being unable to delete photos on Facebook can be frustrating for many users, but this usually stems from clear reasons. Understanding these causes will help you handle the situation more easily and manage your personal content on the platform more effectively.
Photo Not Uploaded by the User
A common reason you cannot delete a photo is that the photo was not uploaded by you. On Facebook, only the person who uploaded the photo has the right to delete it. If the photo was posted by someone else and you are only tagged in it, you cannot delete the photo but can only remove the tag so that the photo no longer appears on your timeline.
User Permissions
When trying to delete a photo in a page or group where you are not an administrator or editor, your permissions are limited. Only administrators or the person who uploaded the photo can delete it. If you are a regular member, you need to ask an administrator for help to delete the photo.
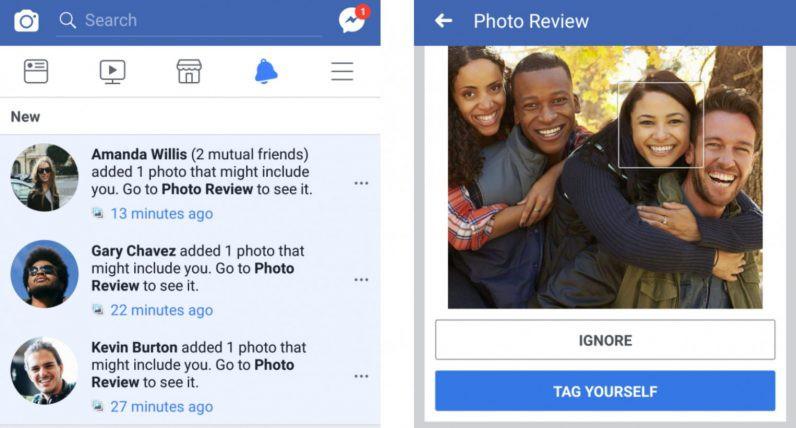
Tagged Photos (Hash-tagged Photos)
If you are tagged in a photo, you cannot delete the photo unless you are the person who uploaded it. However, you can remove your tag so that the photo no longer appears on your timeline, although the photo will still remain on the uploader’s account.
Technical Errors or Temporary Issues
Sometimes, the inability to delete a photo stems from technical glitches or temporary malfunctions on Facebook. These issues may cause the interface to be unresponsive or not display the delete option. In such cases, you should try refreshing the page or wait for a while before trying again.
Photos in Protected Albums
Facebook has special albums such as “Profile Pictures” or “Cover Photos” that come with certain restrictions. Photos in these albums have a special role on your profile and may not be fully deleted. You can hide or replace these photos, but complete deletion might be restricted due to Facebook’s policies.
==> See also: Quality Facebook Ad Account Rental Services
2. How to fix the issue of not being able to delete photos on Facebook
When you cannot delete a photo on Facebook, there are some simple and effective methods to resolve this problem. Here are the ways you can try:
Request the Person Who Tagged You to Delete the Photo
One of the easiest and most effective ways to remove photos in which you are tagged is to ask the person who tagged you to delete the photo. You can proactively contact them via private message or comment directly under the photo. Be respectful and explain why you want the photo to be removed so they can understand and assist you easily. This is a simple yet very useful approach if you do not want to bother others too much.
Untag Yourself (Self-Untagging)
If you prefer not to bother the person who tagged you or if they are unable to delete the photo, you can still untag yourself from the picture. To do this, simply navigate to the photo where you are tagged, click on the tag section, and select the “Untag” option. Although the photo will remain on the poster’s account, it will no longer appear on your timeline, thus alleviating any inconvenience.
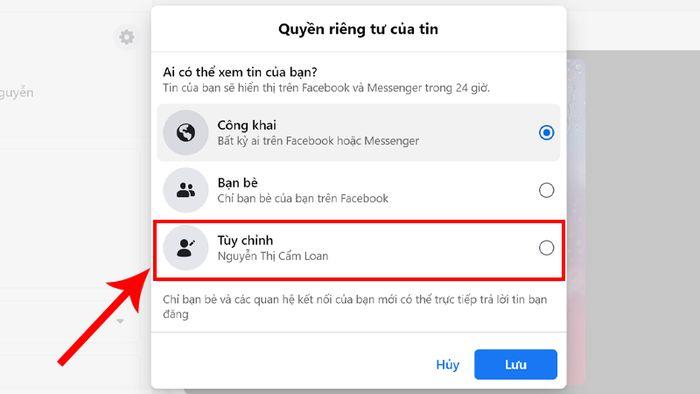
Change Privacy Settings
Another method to control photo sharing is to adjust your privacy settings on Facebook. You can restrict who can view your photos by setting them to be visible only to your friends or friends of friends. These privacy settings help protect your privacy and provide better control over what others can see on your profile.
Create Private Albums
If you wish to share photos with a specific group of friends without making them public, you can create private albums. With this option, you can select the specific audience that can view and interact with the photos. This is an effective way to share photos while maintaining privacy and security for your account.
Contact Facebook Support
In cases where the above methods do not resolve the issue, you can contact Facebook’s support team. They can assist you with problems related to photo deletion, especially when you encounter technical errors or complex issues that cannot be resolved through conventional methods.
3. How to delete photos on Facebook using a mobile phone
Deleting photos on Facebook via a mobile phone is easy and quite similar across different phone models. Below is a detailed guide for two common methods to delete photos from your profile or photo albums.
3.1 Delete Photos from Your Facebook Profile
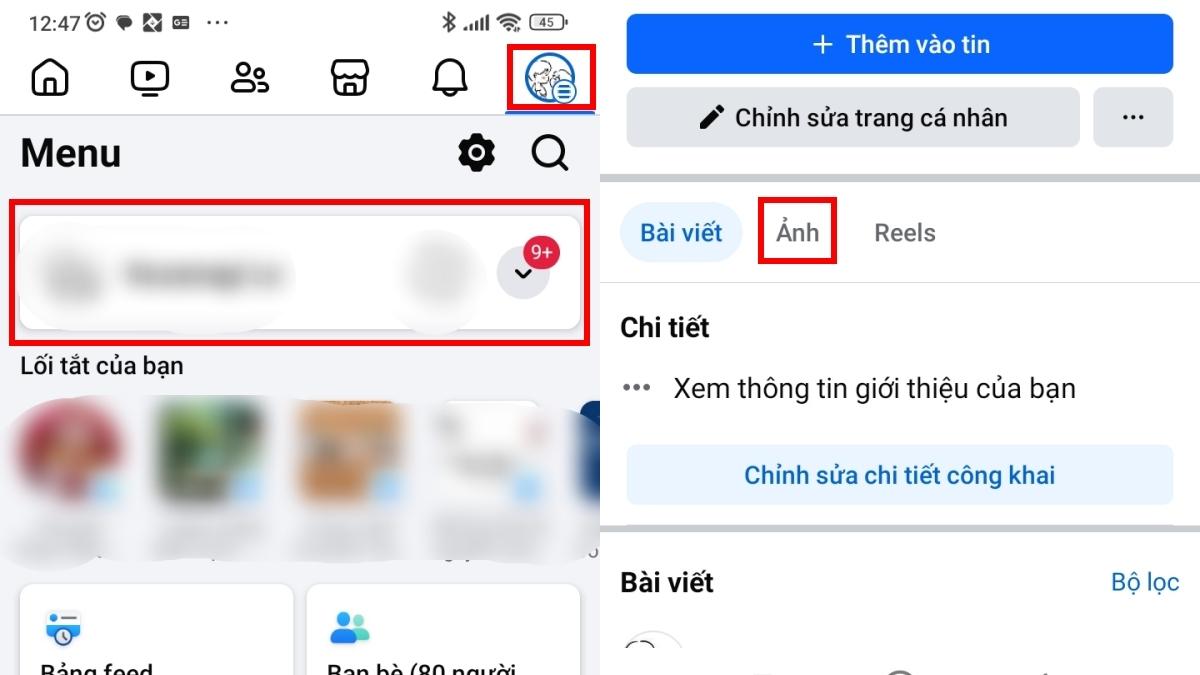
Step 1: Open the Facebook app and tap the “Menu icon” (three horizontal lines) on the status bar, then select “Your Profile.”
Step 2: In your profile interface, tap “Edit Profile”, then switch to the Photos tab.
Step 3: Find the photo you want to delete and tap it to open in full-screen mode.
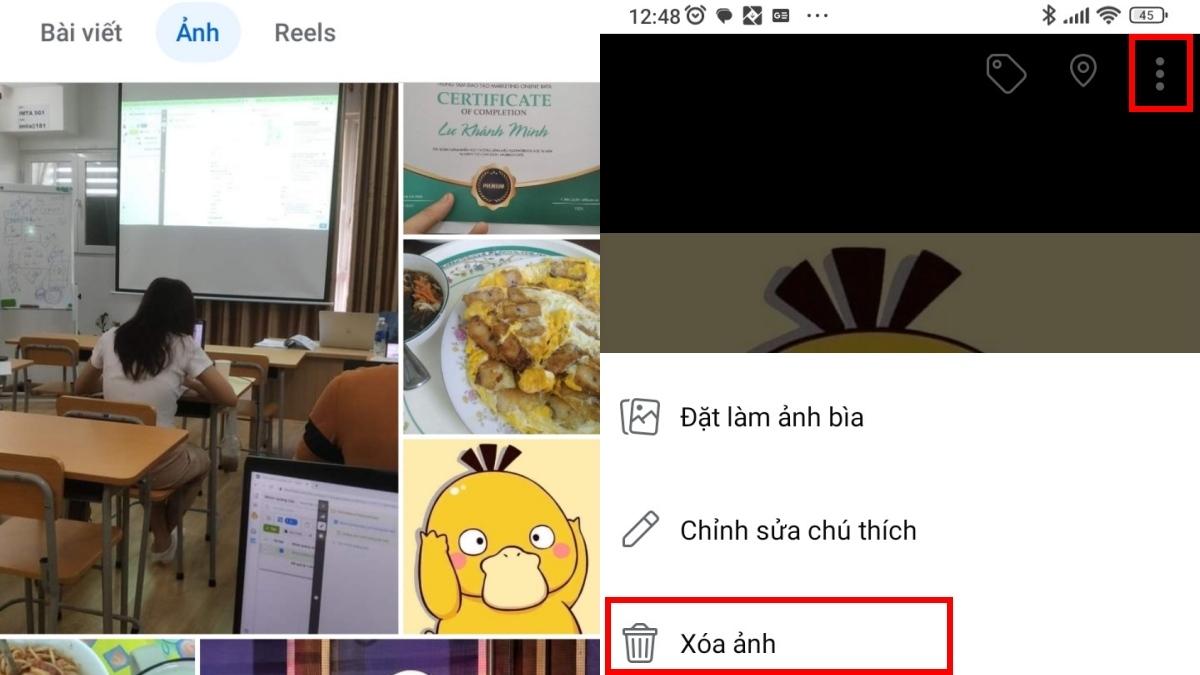
Step 4: Tap the three-dot icon at the corner of the photo and select “Delete Photo”. A confirmation dialog will appear; tap “Delete” to complete the process.
3.2 Delete Photos from an Album
Step 1: Go to your Facebook profile and select the “Photos” tab, then choose “Albums.”
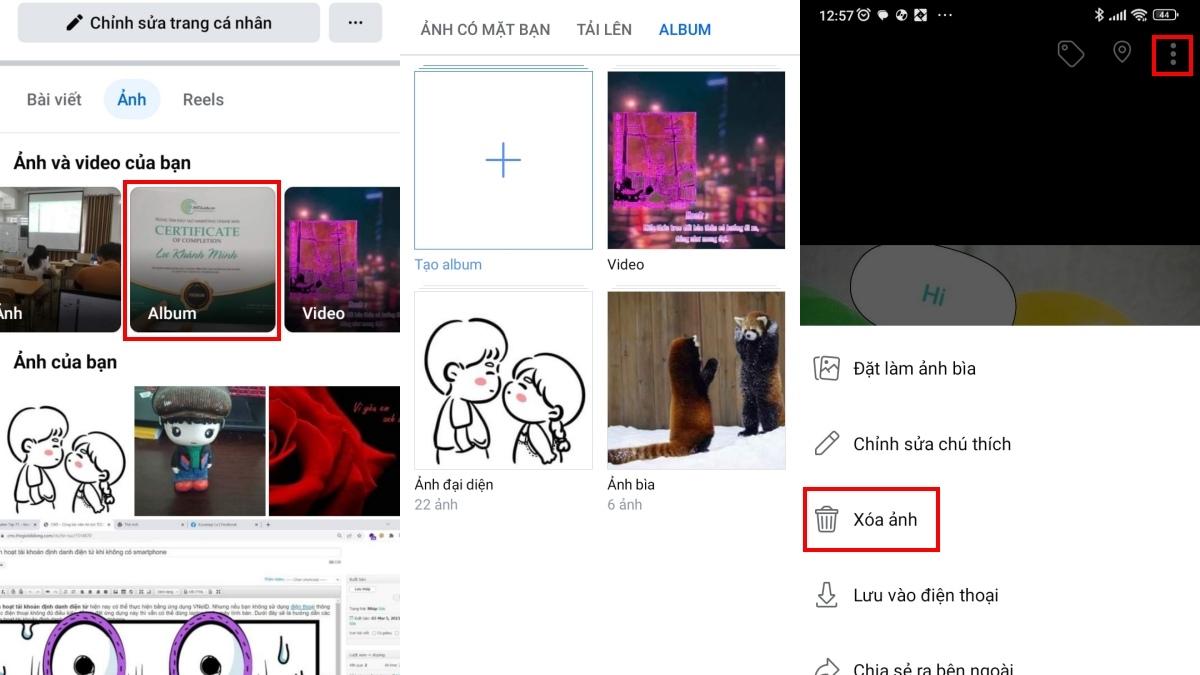
Step 2: Open the album containing the photo you want to delete and tap the photo to open it in full-screen mode.
Step 3: Tap the three-dot icon and select “Delete Photo.” Confirm the deletion to complete the process.
3.3 Delete Multiple Photos on Facebook at Once
Facebook allows you to delete multiple photos or posts simultaneously, saving time when you want to clean up your account. Follow these steps to delete multiple photos at once:
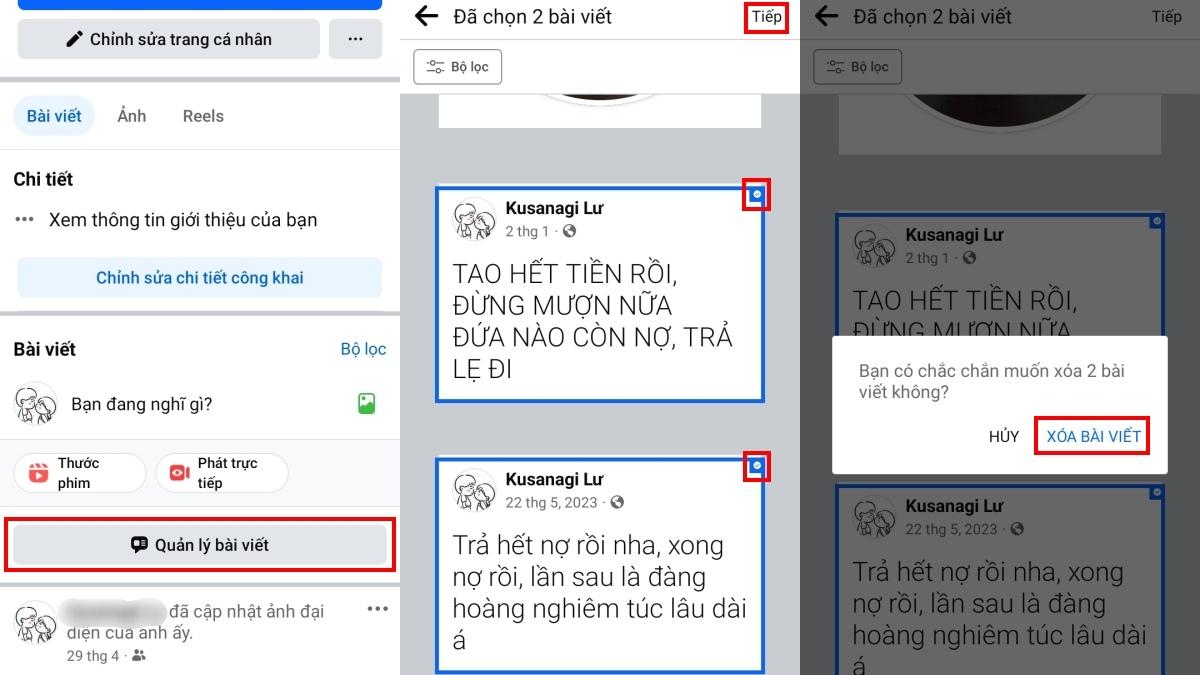
- Access Your Profile: From the app menu, tap your name to go to your profile page.
- Go to Manage Posts: Scroll down and select “Manage Posts”. Here, you will see a list of your posts and photos.
- Select Posts or Photos to Delete: Use the checkboxes next to each post or photo to select the ones you want to delete. You can use filters to search by date, poster, or privacy settings to make selection easier.
- Delete or Hide Posts: After selecting, tap “Next”, then choose “Delete” or “Hide from Timeline” to finish. Note that you can delete up to 50 posts at a time.
Deleting photos in bulk not only saves time but also helps protect your privacy. You can easily hide past moments you no longer want to share publicly and refresh your profile as you wish. Knowing these steps will help you manage your Facebook content more easily and efficiently.
4. How to delete photos on Facebook using a computer
Deleting photos on Facebook via a computer is quite simple and can be done in a few easy steps. Here is a detailed guide to help you remove unwanted photos from your personal account.
Step 1: After successfully logging into Facebook on your computer, click on your name located at the top left corner of the screen. This will take you to your personal profile page, where you can manage all the content you have shared.
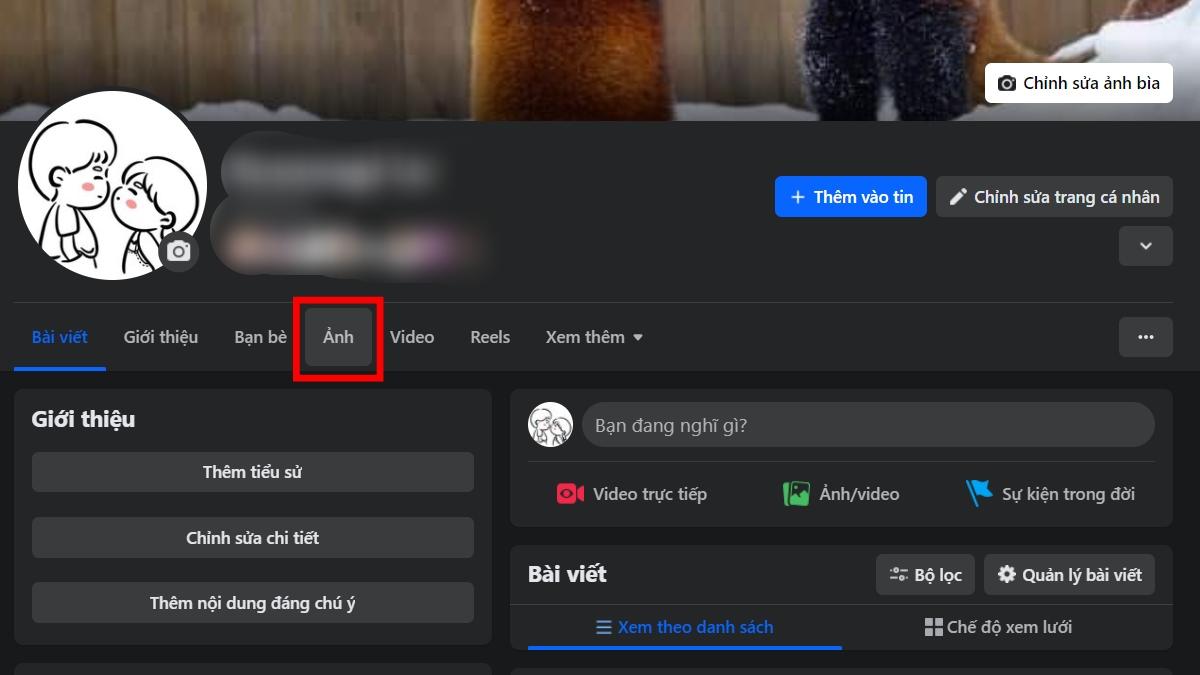
Step 2: On your profile page, click on the “Photos” tab to access all photos you have uploaded or been tagged in.

Step 3: Here, you can only delete photos that you have uploaded yourself. Select the photo you want to delete, then click the three-dot icon at the top right corner of the photo. From the dropdown menu, choose “Delete Photo.”
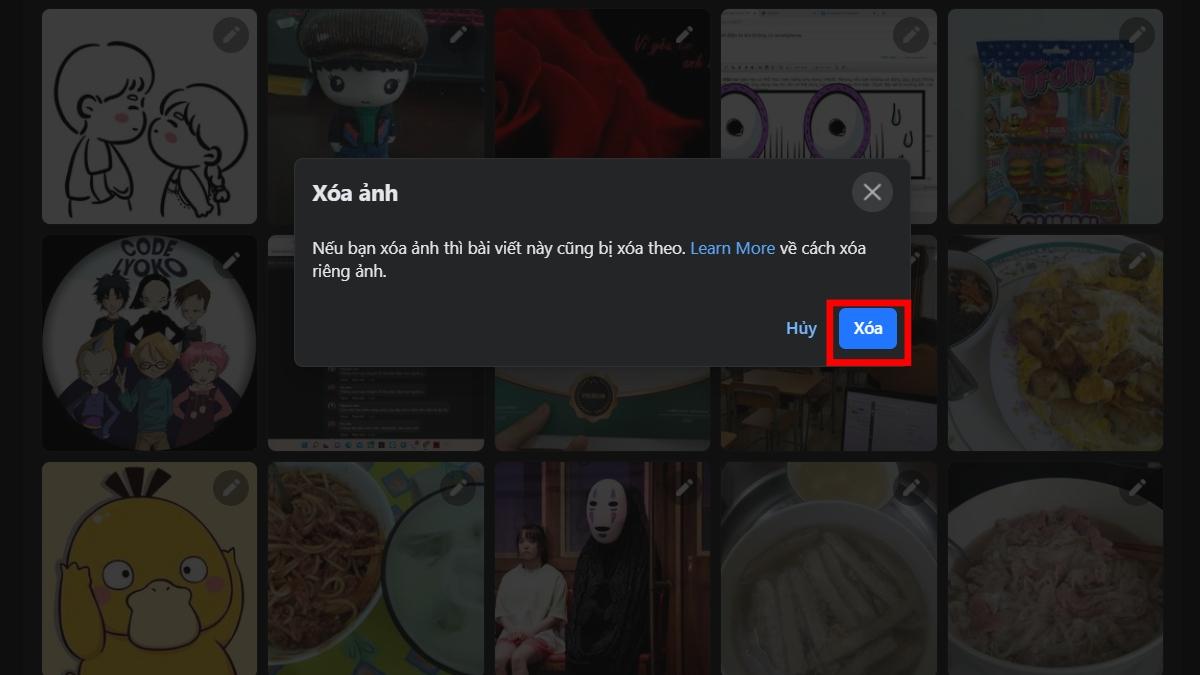
Step 4: A confirmation window will appear asking you to confirm the deletion. Click “Delete” to finalize the process. After this step, the photo will be permanently removed from your Facebook account.
Understanding the reasons why you cannot delete photos on Facebook is the key to solving the problem quickly and effectively. By applying these solutions, you will be able to manage your personal content on Facebook more easily and avoid unnecessary troubles.